Be it the entire window, a small section, or even a free-form shape that you can draw yourself, taking a screenshot on an HP laptop or desktop is one of the easy ways to capture and share information on your screen.
Understanding How to Print Screen on an HP Laptop
To print screen on an HP laptop, search “Snipping Tool” from the Start menu, select your preferred snip type, and draw around the area you want to capture. The screenshot will then open in the Snipping Tool window for further editing or saving.

For HP users who have the Windows 10 update or later, they can use the Snip & Sketch feature to take screenshots.

By pressing the Windows key + Shift + S, a selection toolbar will appear at the top of your screen. Choose the type of snip you want, and your screen will dim, signalling you to select the screenshot area. Once you make a screenshot on an HP laptop, it’s very easy to save and share with others.

If you capture the screen for a screenshot on an HP laptop or desktop, you can make edits or save the screenshot to your desired location. It’s an easy way to take, edit, and save screenshots on an HP laptop or desktop.
The Snipping Tool is not the only solution, though.
The Windows Key + Print Screen button also allows for instant screen capturing.
When this combination is pressed, the screen will dim for a moment, indicating the screenshot has been taken and automatically saved in your Pictures folder. HP tablets running Windows or Chrome operating systems have simple button-press processes for capturing the screen.
On Windows tablets, for instance, you can press the power button and volume down button simultaneously to take a screenshot. For more specific captures, partial screenshots might be the best solution.
To accomplish this, the ‘Print Screen’ key is combined with either the ‘Windows Key’ or ‘Alt’ key. The former captures the entire screenshot on an HP laptop or desktop with just one click.
Easy Ways to Take a Screenshot on HP Laptops
It’s important to remember that your journey can vary based on your operating system when trying to take a screenshot on an HP laptop. For those navigating Windows 10, the process of taking a screenshot can be achieved through an assortment of methods, stretching from basic keyboard button shortcuts to utilizing the Snipping Tool or even a dedicated screen recorder.
Those utilizing Windows 7, or even the older Windows Vista, have specific methods tailored to their systems, which may include using the print screen key or the start menu.
HP devices that run Windows or Chrome operating systems also enjoy a variety of screenshot options.
Particularly, users have the liberty to capture the entire screen or select a portion of the screen they want to screenshot. For more flexibility, the Snipping Tool, a Windows staple, allows you to select and capture any portions of the screen. This can be particularly useful when you need to capture a screenshot on an HP laptop during an important virtual meeting or a tutorial session.
Mastering Screenshot Techniques on an HP Device
To use the Snipping Tool, all you need to do is open the tool, select ‘New’, and then choose the type of snip you want.
Options include a free-form snip, a rectangular snip, a window snip, and a full-screen snip.
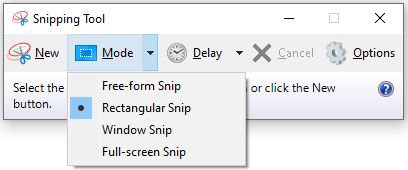
After selecting the type, you simply need to drag your mouse to select the area you want to capture.
You can also take a partial screenshot by using the ‘Print Screen’ button in combination with the ‘Alt’ button.
This method will only capture the active window, not the entire screen, unlike the simple ‘Print Screen’ shortcut, which allows you to create a partial screenshot on your HP laptop or tablet.
HP Laptop or Desktop: Different Methods to Print Screen
Taking a screenshot on your HP device, whether it’s a laptop or desktop, can be easily done using the print screen function, Snipping Tool, or a combination of keys in Windows. The tool offers several options such as the Rectangular Snip and Free-form Snip, which allow you to select any portions of your screen.
If you want to take a screenshot of a specific window on your HP laptop or desktop, press Alt + PrtScn.
This screen capture technique saves the image of your current active window to the clipboard.
To save the screenshot, you need to paste it into a document or image editor. To capture an image of your entire HP device’s screen, simply press the Windows key + PrtScn.

This will dim your screen momentarily indicating a screenshot has been taken and it will be automatically saved in the Screenshots folder within the Pictures directory. In the modern computer age, your HP desktop or laptop running on Windows 10 also allows you to take a screenshot using the snipping tool, which can be easily saved for future reference.
| Method | Keys | Description |
|---|---|---|
| Snipping Tool | None | Offers several options such as the Rectangular Snip and Free-form Snip, allowing selection of any portions of the screen. |
| Screenshot of a Specific Window | Alt + PrtScn | Captures the image of the current active window and saves it to the clipboard. The screenshot needs to be pasted into a document or image editor to be saved. |
| Screenshot of Entire Screen | Windows key + PrtScn | Captures an image of the entire screen.The screen will dim momentarily indicating a screenshot has been taken and it will be automatically saved in the Screenshots folder within the Pictures directory. |
Using Windows 10 for Screen Captures on HP
From sharing a funny text conversation, demonstrating an application’s functionality, to providing a visual guide for tech support, many users on their HP tablet with Windows 7 might want to take a screenshot of their entire screen and save it using the print screen key, also known as PrtScn. This copies the image to the clipboard when the Windows key is pressed simultaneously. With HP laptops or desktops running Windows or Chrome operating systems, taking a screenshot is made easy.

And the best part is that it’s not just about capturing the entire screen; you can also select the portion of your screen that you wish to grab, thanks to the flexible options that the OS provides.
If you’d like to make your screenshots more interactive, Windows 10’s Snipping Tool is designed for that.
This feature allows you to select any-sized portion of your screen while giving you added features like text, drawing, and highlighting. The tool comes with a standard rectangular snip, free-form snip, window snip, and full-screen snip options.
HP tablets that run Windows also allow for the seamless capture of screenshots
The Essential Guide to Screenshots on Your HP Laptop
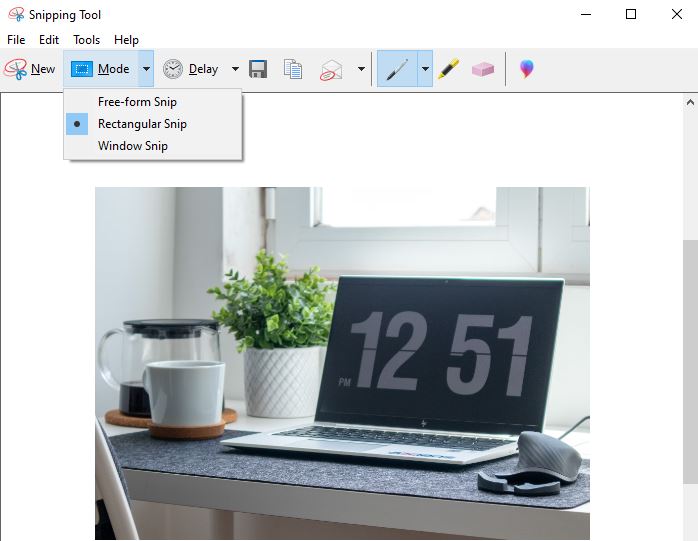
Click on the ‘snipping tool’ and select your desired image capture mode. For added flexibility, there’s the rectangular snip option that enables you to capture images in any shape and size.
Another intriguing feature of HP laptops is the default ‘print screen’ option.
By just pressing this key, a screenshot of your whole screen is immediately saved to your clipboard.
Not only this but if you are looking to save the screenshot directly, the combination of the Windows key and the ‘print screen’ button will allow for that. The screen will dim for a moment, indicating that a screenshot has been taken.
If you’re operating with an HP tablet on Windows, taking a screenshot is equally straightforward. The start menu provides access to the ‘snipping tool,’ enabling you to select the portion of your screen for capture. Simply press the Windows logo and volume down key simultaneously to capture a portion of your screen, providing an easy way to take screenshots.
Key Features for Taking Screenshots on HP Devices
- The ‘snipping tool’ on HP computers allows users to select and capture specific portions of the screen, with the ‘rectangular snip’ mode providing added flexibility in terms of shape and size.
- By pressing the ‘print screen’ key, a screenshot of the entire screen can be instantly saved to the clipboard.
- For direct saving of screenshots, the combination of the Windows key and the ‘print screen’ button can be used. The screen briefly dims to indicate successful capture.
- On an HP tablet running Windows, the start menu provides access to the ‘snipping tool’, and the Windows logo and volume down key can be pressed simultaneously to capture a portion of the screen.
Print Screen: Not Just for Desktops
HP laptop or desktop is the snipping tool that allows you to select a specific area you want to screenshot, when you do this the screen will dim. Found within the Windows Start Menu, this convenient utility allows you to capture screenshots in any shape you desire – from the standard rectangular snips to free-form captures.
To use the tool, simply select your preferred snip shape, and then drag your mouse across the screen section you want to capture.
The traditional method to take a screenshot on an HP device using the ‘Prt Sc’ key on the keyboard is straightforward.
Pressing the ‘Prt Sc’ key will instantly capture the entire screen and save it to the clipboard. From here, you can paste the screenshot into an editing tool or document of your choice.
If you’re using a Windows 10 system on your HP laptop or desktop, you also have the built-in game bar screenshot tool. By pressing Windows Key + G on the keyboard, the screen recorder feature is activated, allowing you to capture videos directly from your desktop.
How to Capture the Screen on Your HP Tablet
An HP tablet can go beyond just the full screen or a simple rectangular snip, it allows you to draw, capture an image, and take screenshots by just pressing a few keyboard buttons, making the operation quite versatile whether you run Windows or Chrome operating systems. By choosing the editing tool within the gallery, you can also transform your screenshot into an artistic statement, adding text or drawing on top of your captured image.
Even though your device’s built-in photo editor may not be as advanced as third-party software, it’s still a powerful tool for basic photo manipulation.
If you’re running Windows on your HP tablet, you have more screenshot options because of the deeper integration with the Windows Snipping Tool.
This application allows you to select any sized portion of your screen to take a screenshot. It also offers different types of snips, from full-screen to window snips, and even a free-form snip. What’s more, the Snipping Tool also provides a delay function, which lets you take screenshots of pop-up menus and tooltips, simply by pressing a few keyboard buttons.
Key Features of Taking Screenshots on an HP Tablet
- An HP tablet offers versatile screenshot options, allowing users to capture full screen, rectangular snips, or even draw and capture an image with just a few keyboard buttons.
- The built-on editing tool in the gallery allows you to turn your screenshots into artistic statements by adding text or drawing on the captured image.
- Despite not being as advanced as third-party software, the built-in photo editor on the device is a powerful tool for basic photo manipulation.
- For users running Windows on their HP tablet, they have access to the Windows Snipping Tool which offers a variety of snipping options and a delay function for capturing pop-up menus and tooltips.
Using Snipping Tool for Screenshots on HP
Pop-up windows or drop-down menus on your HP device, can be captured in any shape by using the screenshot keyboard buttons. This handy tool also comes equipped with an image editor, so you can mark up your screenshots right away, without needing to use another program.
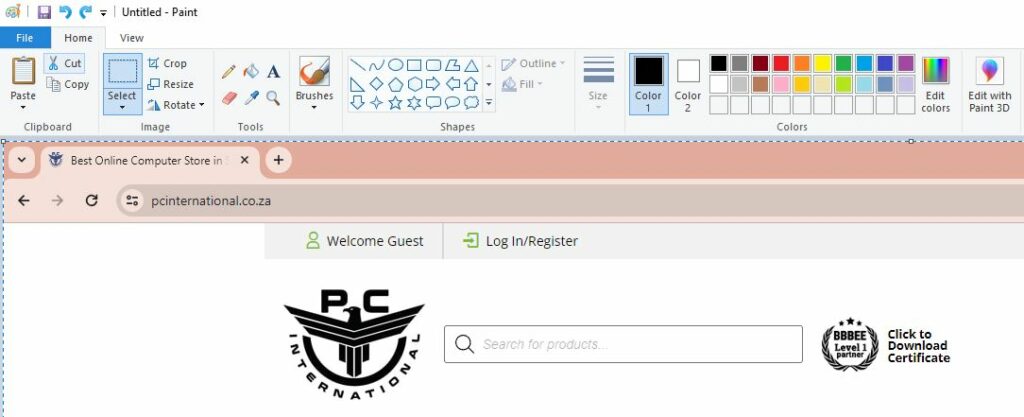
It may not offer advanced editing features but it does allow you to highlight or circle important areas, draw attention to specific sections, or add brief notes.
Another advantage is the convenience of using the Snipping Tool.
While capturing a screenshot using the Print Screen key requires you to paste it into a photo editing program and save it manually, the Snipping Tool automatically opens the screenshot in a new window. Here, you can make the necessary edits and save the image directly.
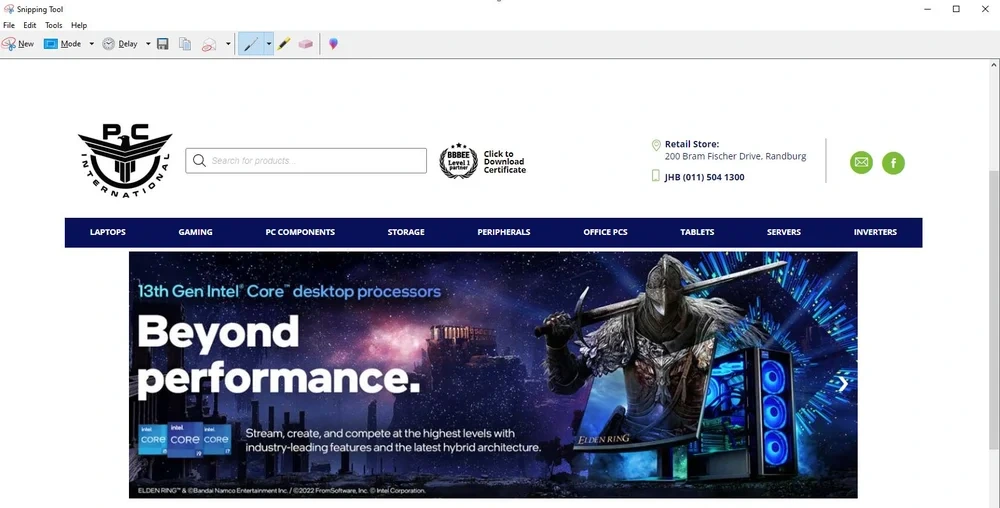
No additional steps are required, making it an easier option for anyone looking to take a screenshot on their HP device.
Saving and Editing Your HP Screenshot
Sometimes, unwanted parts of the screen are captured when the print screen button is pressed. However, your device’s built-in photo editor may offer tools to crop out unnecessary content. It’s a valuable feature introduced in an October 2018 update for Windows 10, allowing users to take screenshots easily.
The Snipping Tool, another screenshot utility built into HP laptops and tablets running Windows 7 or later, offers more control over your screenshots.
This tool allows you to select portions of your screen to capture, essentially enabling you to take a partial screenshot.
Once you’ve selected the desired area, the snippet will disappear from the screen and be saved to your clipboard. From there, you can paste your screenshot into an image editor or document and save it.
If you want to take a screenshot of your entire screen, press the Windows key and Print Screen key simultaneously. Your screen will dim for a moment, indicating a screenshot has been taken. The image is then saved in your device’s storage, where you can further customise it before sharing.
Key Points about Screen Capturing on Windows
- The October 2018 update for Windows 10 introduced a feature for taking screenshots easily.
- The Snipping Tool, a screenshot utility in HP laptops and tablets running Windows 7 or later, allows users to take partial screenshots by selecting portions of the screen.
- Taken screenshots are saved to the clipboard and can be pasted into an image editor or document for further use.
- To take a screenshot of the entire screen, users can press the Windows key and Print Screen key simultaneously. The screenshot is then saved in the device’s storage.
Partial Screenshot: Capturing a Section on HP Laptop
HP laptops now come equipped with the snipping tool that permits users to select portions of their screen to capture, meaning you’re no longer limited to capturing the full display. This unique feature, termed a partial screenshot, meets the need to capture selective information without including irrelevant areas.
The valuable partial screenshot option differs significantly on an HP laptop as it includes the Snipping Tool, which was introduced as the primary featured tool in an update rolled out.
It allows users to select portions of any size, eliminating the need for manually cropping the full-screen capture.
The steps to use the Snipping Tool are easy to follow and will enable you to understand the functionality effectively. Once you make a selection, the snippet will disappear and be saved to your clipboard for future reference or use.
Advanced Screenshot Techniques: Beyond the Print Screen Button.
HP devices come with the Print Screen button located in the keyboard that aids in taking a quick screenshot of the entire screen.
This process is more straightforward, requiring only the press of a single button to capture the screen and save the image to your clipboard.
In the case of HP tablets, taking a screenshot can be as easy as pressing a few keyboard buttons or using unique tools to achieve partial screenshots
This flexibility allows you to grab just what you want without needing to capture the entire tablet’s screen.
Key Features of HP’s Screenshot Tools
- HP’s photo editor offers tools for editing or annotating, including features for cropping, resizing, and a snipping tool for selecting specific areas.
- HP devices have a Print Screen button on the keyboard for quick and easy full-screen screenshots.
- HP tablets offer the ability to take screenshots with a few keyboard buttons or more unique tools for capturing partial screenshots.


