

Let’s face it, a powerful computer is a source of great satisfaction for every PC enthusiast, but dust accumulation can eventually affect even the most robust systems, leading to overheating and performance issues.
Cleaning up your computer is necessary, even though it may not be the most glamorous aspect of owning a powerful device. It’s like getting a tune-up for your car; a little maintenance goes a long way toward keeping everything functioning well.
In the same vein, this guide will take you through an in-depth tutorial on how to clean your PC, ensuring every component, from the CPU and GPU to the power supply and cooling fans, is in optimal condition. I’ll go over each step with you to ensure you’re ready to take on dirt and dust bunnies like a pro.
Let’s get straight to it!
Step 1: Gathering Your Tools and Supplies
The first step to cleaning up a PC is gathering up all necessary items, before opening up your PC or disassembling any attachments. Being prepared is key, as this task can get messier than expected if care is not taken.
Important items to clean up your computer include:
- Compressed Air Canister: Essential for blowing out dust from hard-to-reach places.
- Microfiber Cloths: Gentle on surfaces, perfect for wiping down components.
- Isopropyl Alcohol (90% or higher): Effective for cleaning without leaving residue.
- Cotton Swabs: Ideal for detailed cleaning of small areas.
- Soft Brush: Useful for dusting off delicate components.
- Screwdrivers: Necessary for opening cases
- Anti-static Wrist strap: Protects sensitive components from static electricity damage.
- Vacuum Cleaner with Anti-static Attachment: Optional but useful for safely removing large dust accumulations.
Having these tools at hand ensures you can address both the exterior and interior cleaning needs of your PC.
Step 2: Preparing Your PC for Cleaning
Now that you’ve successfully gathered your tools, it’s time to prepare your PC for cleaning. Yes, another preparation step 🙂. But before anything, shut down your PC and unplug all cables, including the power, monitor, keyboard, and mouse. This step not only ensures your safety but also protects your hardware from potential electrical damage.
Next, discharge any static electricity by using an anti-static wrist strap. This simple precaution can prevent static discharge from damaging your sensitive components.
A clear workspace free from dust, clutter, and water will make the cleaning process smoother and more efficient. It’s also important to move your PC to a clean, well-lit area. Good lighting is vital for spotting dust buildup and ensuring you clean every nook and cranny.
Step 3: Cleaning the Exterior of Your PC
Your computer’s exterior is often where dust and fingerprints accumulate the most. Using a microfiber cloth moistened with isopropyl alcohol, begin by cleaning the case. Pay attention to high-touch regions such as the front panel and power button. This process cleans and disinfects the surfaces.
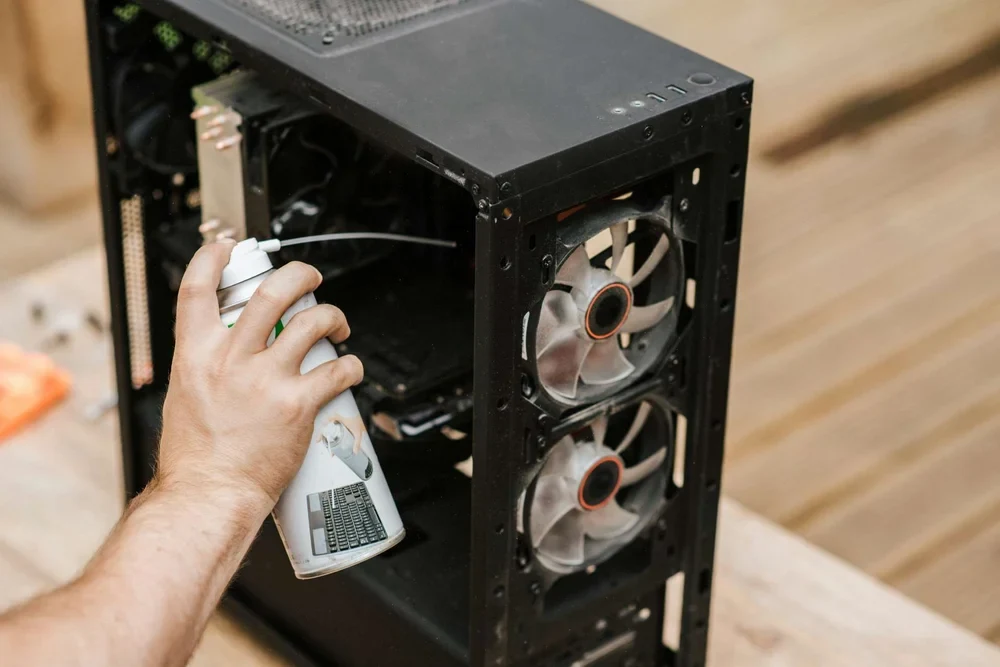
Use compressed air to remove any dust from ports and vents. To prevent condensation, hold the can upright and spritz in short bursts.
For accessories like your monitor, keyboard, and mouse, use a microfiber cloth to clean them gently. For the keyboard and mouse, cotton swabs dipped in alcohol can reach the crevices between keys and other tight spots, ensuring a thorough clean. Let’s dive into the next step.
Step 4: Cleaning the Interior of Your PC
This is where things get serious: taking off your PC casing will reveal all of its internal parts as well as any debris or dust that may have gotten inside. So, you need to be very careful.
To remove the side panel(s), open the case with the appropriate screwdriver. Again, before you embark on this procedure, you need to turn off your PC.
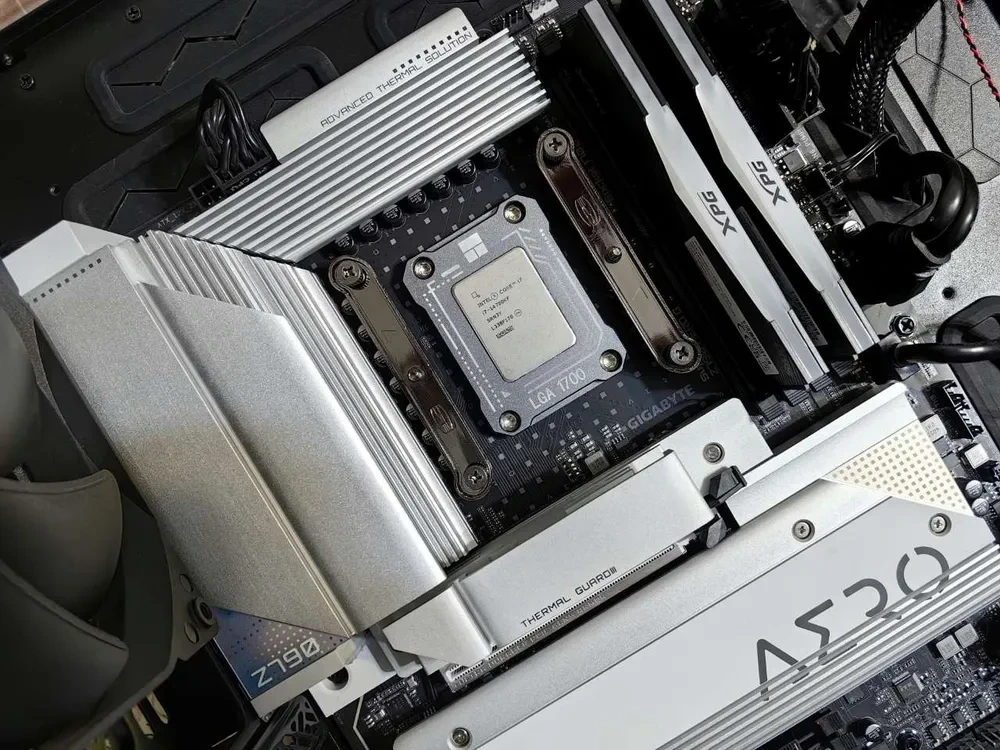
Carefully use compressed air to blow out dust from the motherboard, GPU, CPU cooler, RAM modules, and power supply. Hold fans in place to prevent them from spinning, as this can generate current and damage the components. Use a soft brush to gently remove dust from fans and heatsinks.
For a more thorough clean, you might consider removing the CPU cooler and reapplying thermal paste if needed. You can then gently wipe down larger components like the GPU and hard drives with a microfiber cloth dampened with isopropyl alcohol. Avoid touching the motherboard directly; instead, use compressed air and a soft brush to clean.
Bonus Tip: Maintaining Your PC’s Performance
Beyond physical cleaning, software maintenance is crucial for keeping your PC in optimal shape. Regularly update your BIOS/UEFI firmware, graphics drivers, and other system drivers to ensure optimal performance and security.
Use disk cleanup tools like cleanmyMac or Wise disk cleaner to remove unnecessary files and defragment traditional hard drives. This utility identifies and eliminates unnecessary files that have accumulated over time.
For SSDs (Solid State Drive), ensure TRIM is enabled to maintain speed. A trim command allows an operating system to inform an SSD that blocks of data are no longer considered to be “in use” and therefore can be erased internally.
Utilize tools like HWMonitor or AIDA64 to monitor your system’s temperatures, voltages, and fan speeds, helping you catch potential issues early.
Regular Maintenance Tips
To keep your PC clean and in good shape, make regular maintenance a habit. Beyond monthly surface cleaning, quarterly deep cleaning, and annual hardware checks, it’s crucial to monitor dust levels consistently, especially if you have pets or live in a dusty environment. Keeping your workspace clean can significantly reduce the amount of dust entering your PC.
Proper cable management is essential for maintaining good airflow and making future maintenance easier. Use zip ties or Velcro straps to keep cables organized and out of the way of cooling fans. Additionally, regularly updating your OS (operating system), antivirus software, and essential programs can protect your system from vulnerabilities.
Occasionally, check for firmware updates for components like SSDs, motherboards, and GPUs, as these updates can enhance performance and fix bugs. Remember to clean your peripherals such as keyboard, mouse, and monitor regularly.
Lastly, if your PC case has dust filters, clean them regularly. Ensure that all fans, including case fans and CPU coolers, are free of dust and functioning properly. This holistic clean-up computer approach will keep your PC running smoothly and extend its lifespan.
Summary
The capacity of a PC to disperse heat is impacted by dust buildup, which can eventually result in problems like your ‘turns on but no display’ and limit the lifespan of components like your CPU. Therefore, a clean and well-maintained PC not only performs better but also has a longer lifespan.
By following this detailed PC cleaning guide, you can keep your system running smoothly, whether you’re tackling the latest AAA games or running complex software suites. For additional optimization, it’s important to explore how to download apps on a laptop, which can help streamline your workflow.
When it’s time to upgrade, ensure you get the most value by checking out our recommendations on buying the best PC deals. Keeping your PC clean and well-maintained is an investment in your productivity and computing experience and I’m sure you’d be glad you did.
