


CPU overclocking unlocks your computer’s hidden potential. By pushing your processor beyond factory settings, you get to boost performance without having to buy new hardware.
Ideal for gamers, video editors, and tech enthusiasts, CPU overclocking offers higher frame rates, faster rendering times, and improved responsiveness for demanding tasks.
However, overclocking isn’t a simple flip of a switch, it requires meticulous adjustments and careful monitoring. Done correctly, overclocking rejuvenates your system, but anything less and you risk instability, crashes, or even permanent damage to your hardware.
This guide will demystify CPU overclocking, starting with the basics. By the time you’re done reading, you’ll have learned how to overclock your CPU safely and confidently. Let’s dive in.
Understanding CPU Overclocking
Overclocking your CPU involves increasing its clock speed beyond its default settings to boost performance. This process can significantly enhance your computer’s capabilities, especially for resource-intensive tasks like gaming, video editing, and 3D rendering.
To grasp overclocking, think of your CPU as a car engine: you can rev it up to go faster, but you need to understand its limits and handle the extra strain to prevent damage.
When you overclock the CPU, you adjust the base clock speed and the multiplier to achieve a higher overall speed. This process requires careful management of the voltage supplied to your CPU, as higher speeds demand more power.
The goal is to find a balance where your CPU runs faster without becoming unstable or overheating. In a nutshell, overclocking your PC is basically fine-tuning your CPU for better performance by increasing clock speeds, and adjusting voltage, while managing your computer’s temperature.
Preparing for Overclocking
Before overclocking your PC, ensure you’ve taken these essential preparation steps to minimize risks:
Research Your CPU Model: A quick search on Google, Reddit, or Quora will provide you with the information you need about your CPU’s overclocking capabilities.
While high-end models like AMD’s Ryzen and Intel’s K-series chips are specifically designed with overclocking in mind, locked CPUs, such as the famous Pentium g4560 are not.
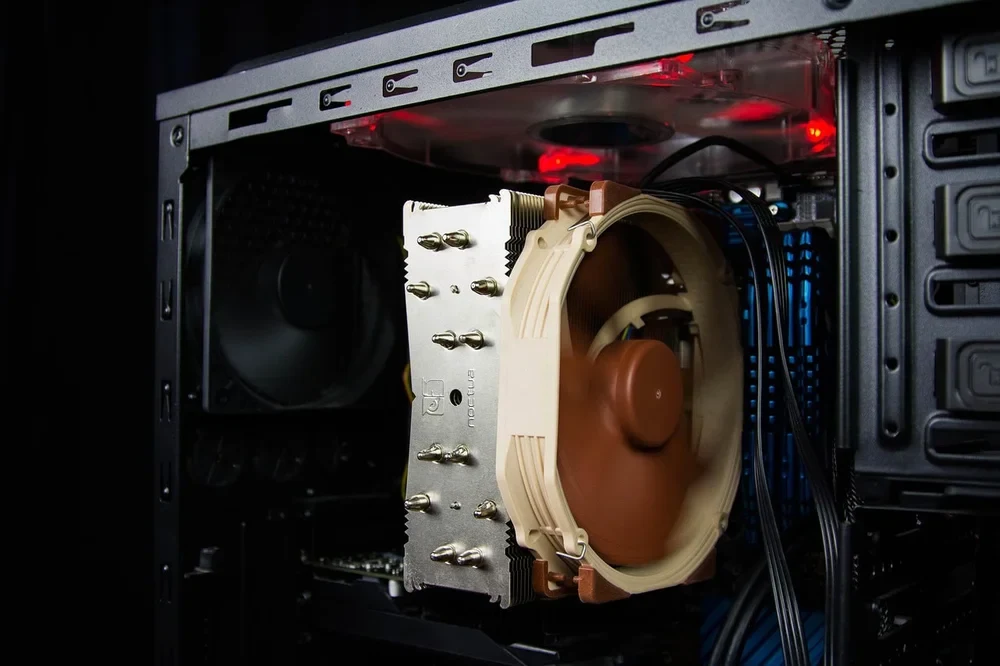
Invest in Cooling Solutions: Overclocking generates extra heat, so stock coolers might not suffice. Invest in an aftermarket air cooler or a liquid cooling system to keep temperatures in check.
Check Your Power Supply Unit (PSU): Ensure your PSU is reliable and capable of handling the increased power demand, as overclocking significantly boosts power consumption.
Use Essential Software Tools: Tools like CPU-Z, HWMonitor, and Prime95 help monitor performance, temperatures, and stability throughout the overclocking process.
Backup Important Data: Overclocking can sometimes lead to system crashes, so backup your important data to avoid potential data loss.
Once you have checked every item on the list above, you’re all set to proceed. Let’s move on to the actual process.
Step-by-Step Guide to Overclocking Your CPU
The following are the steps required to overclock your CPU:
Step 1: Enter the BIOS/UEFI
I promise It’s not as complicated as it sounds. First, restart your computer, and as it boots press the key indicated on the screen (commonly Del, F2, Esc, or F10) to enter BIOS/UEFI (Basic Input/Output System and Unified Extensible Firmware Interface). The specific key can vary by the motherboard manufacturer.
Once inside BIOS/UEFI, navigate to the section labeled “Advanced,” “Overclocking,” or “OC Tweaker.” This is where you’ll find the settings needed for overclocking.
Modern UEFI interfaces often support mouse input and are easier to navigate than older BIOS interfaces. Take a moment to familiarize yourself with the layout and options available.
Step 2: Adjust the Multiplier
The next step is to locate the CPU multiplier setting in the BIOS/UEFI. This cautious approach helps prevent instability and potential damage to your system.
The multiplier, when combined with the base clock (usually 100 MHz), determines your CPU’s frequency. For example, a multiplier of 40 with a base clock of 100 MHz results in a 4.0 GHz CPU speed. Increase the multiplier incrementally (e.g., by 1x) and test for stability at each step before making further adjustments.
Step 3: Increase Voltage
If your system becomes unstable after adjusting the multiplier, you might need to increase the CPU voltage (Vcore). Do this cautiously, increasing in small increments (e.g., 0.01V). Higher voltage can help stabilize the CPU at higher frequencies, but it also increases heat output and power consumption.
Always test for stability after each adjustment to ensure your system remains stable. This will be discussed in the next step.
Step 4: Test Stability
Use stress-testing software like Prime95 to test your CPU’s stability after each change. Run the stress test for at least an hour while monitoring for any errors or crashes.
This ensures that your CPU can handle the increased frequency under load. Keep an eye on your system’s temperatures and stability throughout the test to avoid potential issues.
Step 5: Monitor Temperatures
Monitoring temperatures is crucial when overclocking to prevent overheating and thermal throttling. Use tools like HWMonitor to track your CPU’s real-time temperatures.
Keep your CPU temperatures below 85°C to avoid damaging the processor. If temperatures get too high, consider improving your cooling solution or reducing the overclock to maintain safe operating conditions.
Step 6: Fine-tune and Save Settings
As soon as you’ve tested stability and ensured that your CPU temperatures are within safe limits, it’s time to finalize your overclock. Go back into the BIOS/UEFI and review all the changes you’ve made. Ensure that the multiplier, voltage, and other related settings are set to the values you found stable.
After confirming the settings, save the changes and exit BIOS/UEFI. This is usually done by selecting the “Save & Exit” option in the BIOS/UEFI menu. Your computer will reboot, and if everything is configured correctly, it will start up with the new overclocked settings.
Once back in your operating system, it’s a good idea to run a few more stress tests and benchmarks to ensure that the system remains stable during extended use. Also, monitor the system’s performance and temperatures during normal use to catch any potential issues early.
By following these steps, you will have successfully overclocked your CPU, boosting your system’s performance while maintaining stability and safety.
Monitoring and Testing Stability
Stability testing is a critical aspect of overclocking CPU. You need to ensure that your system can handle the new settings without crashing or exhibiting other unstable behavior.
As mentioned earlier, you can use Prime 95 to see how well your CPU handles heavy loads and to detect any signs of instability like crashes or errors. If no error is detected, you are good to go.
Next, bring in AIDA64 to conduct a comprehensive check-up. It stresses not just the CPU, but also other vital components like the RAM and GPU. This thorough assessment ensures every part of your system works harmoniously under intense conditions.
Note, however, that this procedure can make your CPU very hot, so you will need a monitoring program like HWmonitor or Core Temperature to observe the temperature. If your temperature gets too high, above 63 degrees Celsius for AMD CPUs, then you need to put a hold on the test.
Safety Tips and Precautions
Here are important safety tips and precautions to keep in mind during CPU overclocking:
- Backup your important data: As mentioned during preparation, overclocking can occasionally lead to instability or unexpected issues so you don’t want to take chances with important data.
- Incremental Changes: Make small, gradual adjustments. Large jumps can cause instability or damage.
- Reliable Power Supply: Ensure your PSU(Power Supply Unit) can handle the extra load. A stable power supply is vital for a stable system.
- Consider Long-Term Effects: Over time, even moderate overclocking can potentially reduce the lifespan of your CPU. Balance performance gains with the longevity of your hardware and be prepared to revert to stock settings if necessary.
Troubleshooting Common Overclocking Issues
Even with careful preparation, you may encounter issues like:
- System Won’t Boot: If your computer turns on but the display does not, reset the BIOS by removing the CMOS battery or using the BIOS reset jumper on your motherboard. This often resets your settings to default, allowing you to start over.
- System Crashes: Reduce the multiplier or voltage incrementally until stability is restored. System crashes typically indicate that your overclock is too aggressive, requiring fine-tuning to achieve a stable configuration.
- Overheating: Ensure your cooling system is functioning correctly. If necessary, upgrade your cooling solution and improve case airflow. Proper cooling is essential to prevent damage and maintain performance.
Conclusion
Overclocking your CPU can breathe new life into your gaming desktop computers, delivering better performance for demanding tasks. By following this guide and understanding the risks and precautions, you can safely overclock your CPU and enjoy the benefits of a faster, more responsive system.
Remember, patience and careful monitoring are key to a successful overclocking experience so don’t rush it. GGs!
